- Jul 18, 2019
- 3 min read
Updated: Apr 8, 2023
In this post, you will learn how to download and install SQL Server 2014 from an ISO image. I will also download the AdventureWorks sample database and load it into our SQL server 2014.
Downloading ISO image
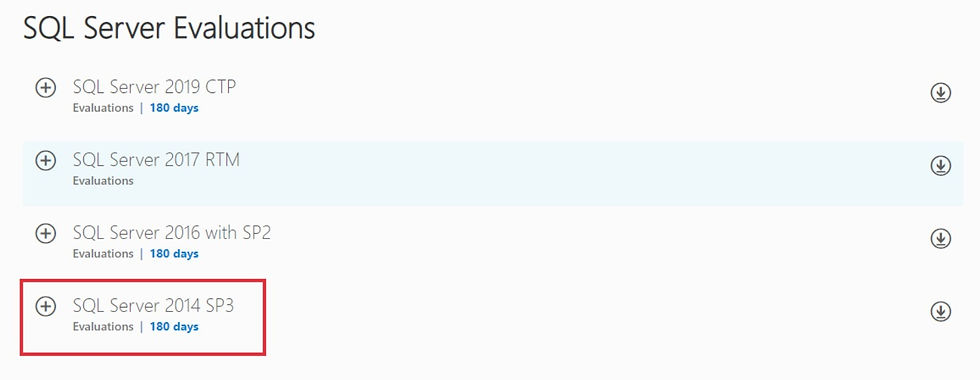
1. You can download the SQL Server from this link. But in case of the link changes, you can Google - "download SQL server enterprise evaluation" and it will show you the results below.
Related: How to file B1/B2 visa for parents?

2. Open the link highlighted above and you will find all the latest SQL Servers available. I am installing SQL Server 2014 for this post. As its old version, it is very stable.

3. Click on the little plus sign and select the iso image to download.
4. Fill out these details and hit continue.

5. Select your platform based on your system properties whether it's 32-bit or 64-bit (Go to your control panel and look for system properties).

The download will take approximately 10 minutes based on your network. It's a ~3 GB ISO file. Make sure you have enough space on your computer to perform this installation.
Run ISO image
1. Once the download is complete, double-click on the ISO file and it will automatically mount on your drive as shown below. If it doesn't mount automatically you can use WinRAR to unzip the ISO file.

2. Open the drive to run the setup.

SQL Server 2014 Installation
1. Setup will take some time (approx. a minute) to open. You will get this screen.

2. Go to the Installation tab as shown above and click on New SQL Server stand-alone installation.

3. Click next, you can select check for updates or leave it as default.

4. This step will take some time (approx. 5 mins) when it will install setup files.

5. Finally, you will get this screen. Click Next.

6. I have SQL Server Express edition running on my machine so we are seeing this option. We will just continue with the new installation default option.

7. Keep this edition as Evaluation and hit Next.

8. Check the box to accept license terms and hit Next.

9. Select SQL Server Feature Installation and hit Next.

10. Select all the features and hit Next as shown below.

11. Enter the name of the instance, I have named it "SQL2014" and hit Next.

12. Leave it as default and hit Next as shown below.

13. Just leave the default as Windows authentication for simplicity and add the current user. Windows will automatically add the current user when you click the Add current user button. Hit Next.

Leave data directories and file streams as default for simplicity. Usually, in a production environment, we choose different drives for logs and data (like in case the server crashes).

14. Leave analysis services mode as default and add the current user. Hit Next.

15. Leave the default options as shown below.

16. Click add current user and hit Next.

17. Give Controller Name, I have named it "Dataneb" and hit Next.

18. Hit the Install button.

19. Installation will take some time (took 1 hour for me). So sit back and relax.

Completion
After 1-hour the installation was completed for me. This might take the same or less time for you depending upon your system configuration.

Now, you can open the SQL Server configuration manager and see if SQL Server 2014 is running or not. I have SQL Server Express edition also running on this machine, ignore that.

AdventureWorks Database
I am loading the AdventureWorks database for example purposes here.
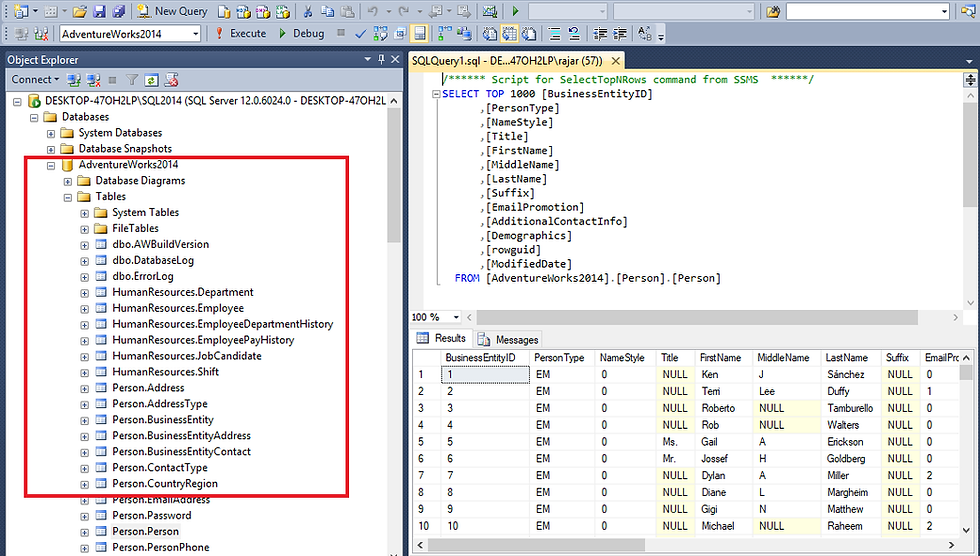
1. In order to load AdventureWorks, open SSMS (SQL Server Management Studio) and connect to SQL2014 which we just installed.

2. Now download a sample AdventureWorks 2014 database from the Microsoft site. You can go to this link, and you can choose anyone. I am downloading AdventureWorks 2014.

3. Once the download completes, move the AdventureWorks2014.bak file to the MSSQL server 2014 backup location. It will be C:\Program Files\Microsoft SQL Server\MSSQL12.SQL2014\MSSQL\Backup

4. Now open SSMS > right click on Databases > Restore Database > select Device > click on three Dots > Add

5. Add the AdventureWorks2014 backup file and hit OK.

6. Once the backup is loaded, you will be able to see AdventureWorks2014 loaded under your database panel, if not right click and refresh.
That's all! If you have any questions please mention them in the comments section below.
_edited_edited.png)

Comments